سيرفر وبروكسي Zuul والتوجيه في الإقلاع أو التمهيد الربيعSpring Boot Zuul Proxy Server and Routing
سيرفر وبروكسي Zuul والتوجيه في الإقلاع أو التمهيد الربيع
Spring Boot Zuul Proxy Server and Routing
Zuul Server هو تطبيق عبارة عن بوابة يعالج جميع الطلبات ويقوم بالتوجيه الديناميكي لتطبيقات الخدمة الصغيرة. يُعرف خادم Zuul أيضًا باسم Edge Server.
على سبيل المثال ، يتم تعيين / api / user إلى خدمة المستخدم و / api / products يتم تعيينها إلى خدمة المنتج ويقوم Zuul Server بتوجيه الطلبات إلى تطبيق الواجهة الخلفية بشكل حيوي.
في هذا الفصل ، سنرى بالتفصيل كيفية إنشاء تطبيق Zuul Server في Spring Boot.
على سبيل المثال ، يتم تعيين / api / user إلى خدمة المستخدم و / api / products يتم تعيينها إلى خدمة المنتج ويقوم Zuul Server بتوجيه الطلبات إلى تطبيق الواجهة الخلفية بشكل حيوي.
في هذا الفصل ، سنرى بالتفصيل كيفية إنشاء تطبيق Zuul Server في Spring Boot.
إنشاء تطبيق خادم Zuul
Creating Zuul Server Application
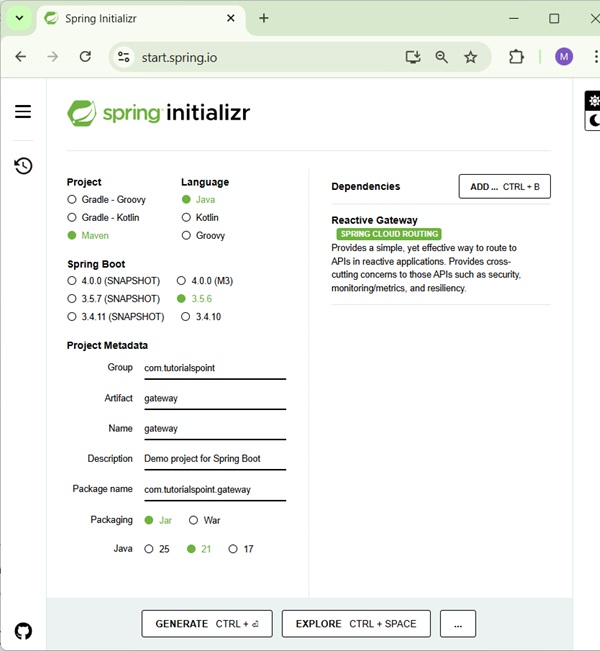
خادم Zuul مزود بتبعية Spring Cloud. يمكنك تنزيل مشروع Spring Boot من صفحة Spring Initializer https://start.spring.io/ واختيار تبعية خادم Zuul.

أضف تعليقًا توضيحيًاEnableZuulProxy على تطبيق Spring Boot الرئيسي. يُستخدم التعليق التوضيحيEnableZuulProxy لجعل تطبيق Spring Boot بمثابة خادم Zuul Proxy.
package com.ahmedalmahallawi.zuulserver;

import org.springframework.boot.SpringApplication;
import org.springframework.boot.autoconfigure.SpringBootApplication;
import org.springframework.cloud.netflix.zuul.EnableZuulProxy;

@SpringBootApplication
@EnableZuulProxy
public class ZuulserverApplication {
   public static void main(String[] args) {
      SpringApplication.run(ZuulserverApplication.class, args);
   }
}
ستحتاج إلى إضافة تبعية Spring Cloud Starter Zuul في ملف تكوين البناء الخاص بنا.
سيتعين على مستخدمي Maven إضافة التبعية التالية إلى ملف pom.xml الخاص بك -
سيتعين على مستخدمي Maven إضافة التبعية التالية إلى ملف pom.xml الخاص بك -
org.springframework.cloud
لمستخدمي Gradle ، أضف التبعية أدناه في ملف build.gradle الخاص بك
compile('org.springframework.cloud:spring-cloud-starter-zuul')
لتوجيه Zuul ، أضف الخصائص أدناه في ملف application.properties أو ملف application.yml.
spring.application.name = zuulserver
zuul.routes.products.path = /api/demo/**
zuul.routes.products.url = http://localhost:8080/
server.port = 8111
/api/demo/ وهذا يعني أن يدعو هتب إلى
yaml ملف
server:
   port: 8111
spring:
   application:
      name: zuulserver
zuul:

routes:
   products:
      path: /api/demo/**
      url: http://localhost:8080/
http ملاحظة - هتب: // localhost: 8080 / التطبيق يجب أن يكون بالفعل قبل التوجيه عبر وكيل زولzuul . ملف تكوين بناء كامل هو جين أدناه أدناه. يمكن للمستخدمين مراف استخدام ملف Pom.xml أدناه -
xml version = "1.0" encoding = "UTF-8"?>
xmlns = "http://maven.apache.org/POM/4.0.0"
xmlns:xsi = "http://www.w3.org/2001/XMLSchema-instance"
xsi:schemaLocation = "http://maven.apache.org/POM/4.0.0
http://maven.apache.org/xsd/maven-4.0.0.xsd">
لافسوت jar زولسرفر تجريبي مشروع ل الربيع التمهيد ORG.SpringFramework.Bot الربيع التمهيد-- بداية لوحة 1.5.9.Ellease أوتف -8 أوتف -8 1.8 إدغوار. ريليس ARG.SpringFramer.clough الربيع-كلاود-- كاتب-زول أورغ. pringprengrework.Bot الربيع التمهيد-- اختبار اختبار اختبار ARG.SPRINGFRAMEWOR.COUD الربيع-سحابة التبت {{سبرينغ-Cloud.Version} بوم استيراد Org.grPingFramework.Bot الربيع التمهيد مافين مستحضر دخول يمكن للمستخدمين استخدام bail.greld ملف جينبين إنميد -
buildscript {
   ext {
      springBootVersion = '1.5.9.RELEASE'
   }
   repositories {
      mavenCentral()
   }
   dependencies {
      classpath("org.springframework.boot:spring-boot-gradle-plugin:${springBootVersion}")
   }
}

apply plugin: 'java'
apply plugin: 'eclipse'
apply plugin: 'org.springframework.boot'

group = 'com.tutorialspoint'
version = '0.0.1-SNAPSHOT'
sourceCompatibility = 1.8

repositories {
   mavenCentral()
}
ext {
   springCloudVersion = 'Edgware.RELEASE'
}
dependencies {
   compile('org.springframework.cloud:spring-cloud-starter-zuul')
   testCompile('org.springframework.boot:spring-boot-starter-test')
}
dependencyManagement {
   imports {
      mavenBom "org.springframework.cloud:spring-cloud-dependencies:${springCloudVersion}"
   }
}
يمكنك إنشاء ملف jar قابل للتنفيذ، وتشغيل تطبيق التمهيد الربيع باستخدام أوامر مافين أو غريدة الواردة أدناه - بالنسبة إلى مافين، يمكنك استخدام الأمر الوارد أدناه -
mvn clean install
بعد "إنشاء النجاح"، يمكنك العثور على ملف jar ضمن الملف المستهدف. للحصول على gradle، يمكنك استخدام الأمر الوارد أدناه -
gradle clean build
بعد "بناء ناجحة"، يمكنك العثور على ملف jar تحت دليل / ببس ديليرك. الآن، قم بتشغيل ملف جرة باستخدام الأمر المعروض أدناه -
java –jar
يمكنك العثور على التطبيق قد بدأت في تومكات 8111 كما هو مبين هنا.

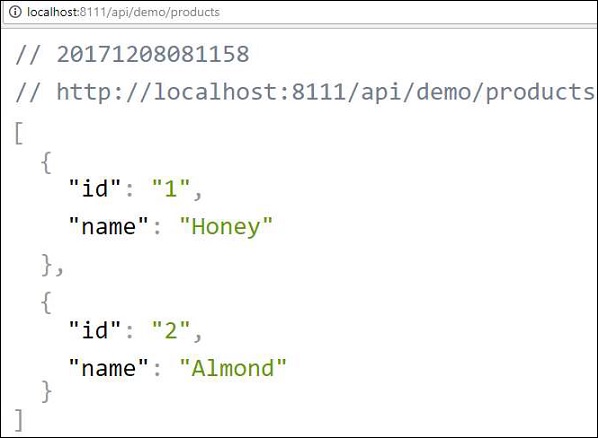
الآن،ضع عنوان url http: // localhost: 8111 / أبي / تجريبي / المنتجات في متصفح الويب الخاص بك ويمكنك ان ترى إنتاج / منتجات restore pointنقطة الرؤية كما هو مبين أدناه -


